pcf8574 backpack

The requested URL /?tag=raspberry-pi was not found on this server.All contributions must adhere to the Idiomatic.js Style Guide, by maintaining the existing coding style. Add unit tests for any new or changed functionality. Lint and test your code using grunt. Licensed under the MIT license. Copyright (c) 2014, 2015 The Johnny-Five Contributors Licensed under the MIT license.The requested URL /viewtopic.php?f=144&t=23479 was not found on this server.I had initially planned to do an LCD tutorial a little further down the line, but there was very high demand for it, and I already had a circuit assembled for testing the new LCD that element14 sent me to evaluate. So, this seemed like an appropriate time to roll it out! In this episode, I explain how communication works with most modern LCD character displays, I show the schematics and circuit required to talk to an LCD, and then I demonstrate it working using two demo programs. The first program will create an animated progress bar using custom characters, and the second will leverage I2C and button debouncing knowledge from tutorial 7 and tutorial 2 respectively to create a real time temperature readout in both Celsius and Fahrenheit.

The following example programs, which I have developed, are written in C for use with Tested with AVR-GCC (WinAVR using a AT90S8515-8PC at 4 Mhz and ATmega8 with 1Mhz.. For easy downloading, all these examples are available in a single archive: I have developed the following libraries which can be used with the AVR-GCC compiler: Tested with AVR-GCC (WinAVR 20060125 or newer) using a AT90S8515-8PC at 4 Mhz and ATmega8 at 1Mhz and 4 Mhz. All libraries are open source under the GNU GPL license. This boot loader support the STK500v2 protocol as used by AVR Studio 4.x and allows application firmware to be upgraded at the target microcontroller via a serial link without the use of a ISP programmer. Fits into a 512work boot loader For testing my AVR starter kit, I have developed the following test program, which is already compiled/linked for direct downloading with aNOTE *** There are no software drivers written for this board to date.

Many users have purchased, but no feed back so far, so you will need to create your own drivers.Small products = Small postal charges.Click on the FAQ & Postage TAB above to get the details of Postage, MMBasic, Geoff Graham the MaxiMite-MicroMite author, Mick Gulovsen the manufacturer of these products, and the details of the Support forum. MBG IO Panel Bare PCB /micks-mite/files/index.php?dir=05+IO-Panel%2FThe IO Panel project came about due to a need to drive quite a few more I-O lines than were available on my small CPU board. I explored several options and ultimately decided that there was nothing already out there in the real world that met my requirements so I designed my own. The IO Panel uses 4 readily available IO expander chips to manage 4 x 8bit (total 32bit) IO ports all on the one I2C interface, effectively giving 32 IO lines by only using 2 from the CPU board. The IO panel has 4 individually addressable IO expanders and whilst 3 of them have been given specific tasks they, of course, can still be used for different purposes than the IO Panel was originally designed for, by using headers J7-J10.

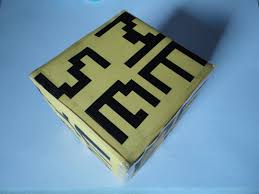
The IO Panel is designed to mount directly on the back of either a 20x4 or 16x4 LCD module and thus make a reasonably compact module as shown below: As mentioned above, the IO panel has 4 dedicated, readily available IO expander chips, these are available fairly cheaply from most electronic parts suppliers but can also be found for under 50c each on eBay. The IO expander part, used here, is a PCF8574 chip, there is a PCF8574A chip that can be used but the `A’ variety has a base starting address of 38H (56 Decimal). The IO Panel can be cascaded to another IO Panel so that 64 IO lines are available on the 1 pair of I2C lines. (Or 128 if another 2 more panels using PCF8574A chips are added) Enter the code in the box below All Maximite and MicroMite support is done on The Back Shed forum at: You will find the MaxiMite Basic author Geoff Graham offering support there also. All of the Micks-Mites range of items are considered available only for the hobbyist market, and are priced to suit.
(NOTE **** Most smaller quantities of Microblock products will fit into the small package) All MGB products are manufactured by Mick Gulovsen, and are based on Geoff Graham's PIC Based MicroMite Basic Computer system. These can be programmed in MMBasic and allows for C extensions for fast routines. The Micromite is a Microchip PIC32 microcontroller programmed with the free MMBasic firmware. These chips cost from $4 to $10 and are available in a variety of packages from 28 pins to 100 pins. When programmed with the Micromite firmware they make a powerful and easy to program microcontroller that is ideal for most hobby projects. MMBasic is a Microsoft BASIC compatible implementation of the BASIC language with floating point, integer and string variables, arrays, long variable names, a built in program editor and many other features. Using MMBasic you can use communications protocols such as I2C or SPI to get data from a variety of sensors. You can measure voltages, detect digital inputs and drive output pins to turn on lights, relays, etc.