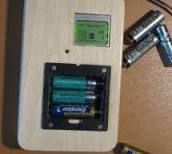
lithium backpack arduino uno

Rechargeable Battery Capacity Tester using arduino Do you have a pile of AA rechargeable batteries in your drawer? Some are old, some are new, but which sets would you bring with your camera on your next trip, and which ones are past their useful life? I like using rechargeable batteries, but I’m certain that some of them are not living up to the stated capacity on the label. So how good are those batteries? Simple battery testers measure the voltage, but t ... Simple Solar Power using arduino Simple Solar Power Light contains energy. When light hits a conductor (or semiconductor) some of the energy is translated into moving electrons, creating current. We can harness the current using solar cells (aka photovoltaic cells). When the sun shines on a solar cell, the current output is mostly constant, which is known as direct current, DC. DC is easy to use and great for charging batteries and powerin ... Telemetry with solar cell using an Arduino *NOTE* THIS PROJECT IS DONE BY A GROUP OF STUDENTS FROM SINGAPORE POLYTECHNIC.
Telemetry - Solar Cells Our project is using Arduino with the ZigBee to transmit and receive data from the solar cell. Data will be shown in the LCD and the software called “X-CTU”. Components used: 1 Arduino Uno 1 ZigBee Shield (Transmitter) 1 ZigBee (Receiver) 1 LCD Monitor 1 Solar Cell 1Resistor (Value may change) Instructions ... Infinity Mirror – Tony Stark Arc-Reactor thing using arduino I'm creating a robot, but am finding that it's better if I break the build down into smaller projects. This is one of those projects, and it seems to have a look that could be used for other things as well. Step 1: Destroy a lady's compact mirror. I took the mirrors out of their plastic housing and used a dremel buffing attachment to buff the silver off the magnifying mirror. This was a horribly tedious tas ... Using an Arduino to Control or Test an SPI electronic device There are many electronic devices that use the SPI bus, or Serial Peripheral Interface bus, for communications (e.g. various sensors, LCD displays, digital potentiometers, D/A and A/D converters, wireless transmitters and receivers, audio volume controls).

The devices receive data serially from a microcontroller using a 3-wire set-up that includes a chip select signal (usually titled CS - when this signal ... Troubleshoot your car battery with ATtiny Last winter I experienced some problems with my car battery. I knew that it was about time to replace it so off I went to buy a new one. This fact reminded me of an old article about a car battery/charging system diagnostics kit I had seen in one of those 1980s electronics magazines. That magazine’s battery monitor relied on an IC that had several analog comparators arranged in a way similar to the ones in ... Measuring Battery Capacity With an Arduino I needed a couple of AA batteries and found the display at the supermarket where they were all arrayed. Normally when I’m shopping in the supermarket, I tend to look at the price/kg or price/l when comparing similar products. In the case of the batteries, there was no such indicator. Fine, I thought, I’ll work it out myself.
I grabbed a few different makes and scanned the packaging for some measure of their ... Lithium Battery Solar USB – iPhone – Arduino Charger One of the most fun and useful projects on instructables is to create your very own solar USB/ iPhone charger.
tf2 the backpack broiler priceThey're not overly difficult to make, nor are the parts overly expensive or hard to find.
wenger jupiter backpackFor the most part they do a rather good job of charging up small gadgets.
shimano t20 backpackThe big flaw in the DIY solar charger world are the batteries.
pugly backpackNearly all the designs on instructables (including all of my des ...
borderlands backpack glitch ps3
Making a 9v Battery DC power supply Rather than use the USB to power my Arduino board with a handy trip to the electronics store with some more knowledgeable people than I, I have constructed a 9Volt DC power supply.
backpack myanmar pantipTaking a 9 volt battery, a 9v battery holder and a 2.1mm coaxial DC jack (positive tip) I have quickly soldered a portable power supply and better yet it works! (You will also need solder and a soldering iron). DC Power Supply Co ... Arduino Solar Cell Tester When I'm building Solar Shrubs and other solar-powered creations, I often scavenge cells from various off-the-shelf devices such as solar garden or security lights. But these cells are rarely labeled as to their voltage, current, and power output. So it's off to my bread-boarding station. First, I put each cell under a lamp and connect it to my multimeter to get the volts. Then I build an I-R curve by measu ...

9 Volt battery adapter for Arduino This is super simple but very useful if you are in a hurry or just like to do things yourself and on the off chance you didn't know, this is about the easiest way to add mobile power to your Arduino. After looking at a number of battery power solutions for Arduino ranging from Lithium Backpacks to Minty Boost kits I decided I didn't want something even that complicated. Granted, the 9 Volt isn't the most ef ... Power your Arduino with a Hand-Cranked Battery If you've ever wanted to power your Arduino or AVR from a battery for development testing (batteries have different power delivery qualities than, say, transformed AC or even a regulated wall wart in DC) testing but were tired of going through batteries (Hey, I admit I've sucked batteries dry in hours because of a slipped-up design before I caught it). Maybe you want to take your design and project mobile, ...» Microcontrollers » Atmel Dev Boards & Kits DIP Carriers & ZIF sockets

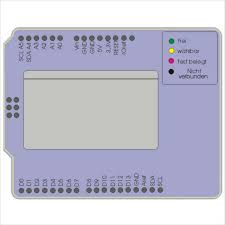
Terminal Blocks & Misc Adafruit Pro Trinket LiIon/LiPoly Backpack Add-on Charge and power your Pro Trinket with this LiIon/LiPoly Backpack Add-on board by Adafruit. Adding a portable power supply to your Pro Trinket just got simple! Adafruit's new LiIon/LiPoly Backpack Add-On is soldered directly to the Pro Trinket and allows for easy integration and charging of 3.7v/4.2v Lithium Ion/Lithium Polymer batteries. If you want to add a power switch to your system, the two 0.1" holes with a box around them are the battery output line. Cut the trace between the two holes, attach your switch leads, and voila, you can easily turn your Pro Trinket on or off. Please keep in mind that ideally, this backpack is for use with the 3.3V version of the ProTrinket. This Backpack Add-on will regulate the 3.7V-4.2V battery voltage down to a usable 3.3V. There are two LEDs - one red and one green. While charging, the red LED is lit. When the battery is fully charged and ready for use, the green LED turns on.

Seriously, it could not get more easy. Charging is performed in three stages: first a preconditioning charge, then a constant-current fast charge and finally a constant-voltage trickle charge to keep the battery topped-up. The charge current is 100mA by default, so it will work with any size battery and USB port. If you want you can easily change it over to 500mA mode by soldering closed the jumper on the bottom, for when you'll only be charging batteries with 500mAh size or larger. For use with 3.7V/4.2V LiIon/LiPoly batteries only! Other batteries may have different voltage, chemistry, polarity or pinout. Comes assembled and tested Uses the 5V input via Micro-B USB connector on the Pro Trinket For charging single Lithium Ion/Lithium Polymer 3.7/4.2v batteries (not for older 3.6/4.1v cells) 100mA charge current, adjustable to 500mA by soldering a jumper closed Batteries and Pro Trinket not included. Dimensions: 15mm x 17mm x 2mm / 0.6" x 0.7" x 0.08"