novara backpack

Most bicycle panniers work well for touring, but don’t meet the needs of people who use their bikes for commuting or shopping everyday. The typical pannier has a main compartment sealed with a zipper or flap, plus a few smaller pockets. The tourist packs it like a hiker would pack a backpack. However, these bags don’t easily hold the urban cyclists’ cargo of shopping bags, daypacks, and laptop computers. An open-topped pannier that works more like a basket than a backpack provides a better way of carrying this kind of gear. These large bags, usually called grocery bag panniers, or shopping panniers, allow you to carry all kinds of oddly-shaped loads and fold flat when not in use. The key to using shopping bag panniers is to keep your gear in a separate bag that you can drop into the pannier. Day packs or book bags work well. I’ve used dry bags when it rains, but have found that plastic garbage bags are easier and cheaper. Having an open-topped bag also gives you a quick place to toss your bike lock, and the convenient access makes it easier to shed clothing layers as you warm up.

Several companies make them. The Jandd grocery bag pannier seems to be the sturdiest, but is also the most expensive, at around US$45 for a single pannier. REI sells a similar, but less refined, bag for US$80 per pair. My favorites, which I use everyday, are the Nashbar Townie baskets, which cost US$17 each.
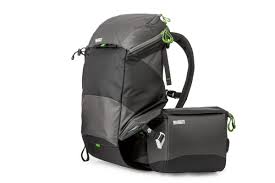
booq 17 laptop backpackUnlike the other grocery bag panniers, they don’t use a rectangular metal frame to reinforce the top of the bag.
oxiclean backpackThis means that they don’t hold their shape quite as well as the others, but it lets the opening at the top adjust to different shaped cargo, like a bulky laptop bag.
backpack ke perhentian kecilThey’re cheap enough that I leave them on the bike all the time, but they remove quickly enough that I can conveniently take one with me to carry stuff while the bike is parked.
rowallan backpack
For the true urban bike guerilla, Cobbworks* takes used 4-gallon food service containers and turns them into hard-shell, waterproof panniers. I rode with one of these before I got the Nashbar Townies. I prefer the Townies because they fold, and because they’re less bulky off the bike, but I miss being able to use the Cobbworks bucket as a stool when I have to fix a flat.
e20 backpackThere’s nothing worse than waking up in the morning – set for work – then taking a peak out of the window to see the last thing in the world you wanted to see… bloody rain.
costco roots backpack 2014 Fortunately, I’ve been blessed for the past couple of years as my commute has seen me cycling the five-or-so miles from my home in Spain, over an International border, over an airport runway to Gibraltar.
orbis backpack
Meaning rainy days tend to be kept to a minimum. However, one of the downsides of living in Mediterranean climbs is that when it rains – it doesn’t pour – it SMASHES it down. In these conditions I tend to abandon my “stylish clothes you can cycle in” ethos and dive into cheap, 100% polyester fully waterproof jackets and trousers, with my work attire on underneath. Although this keeps me dry from the rain, I end do end up pretty damp from sweat anyway – especially if a head wind is present – grim. In a bid to change my ways, this winter I’ve been testing out Otto London’s Urban Poncho, available for £88. (The poncho comes in loads of colours, not just yellow.) I must admit a poncho doesn’t sound like the coolest of garments, but this one is a pretty sleek specimen. It’s a lot shorter than capes from the likes of Cleverhood, so you don’t flap around in the wind too much, and is made from Oxford Nylon which is completely waterproof and isn’t too heavy.

Having not worn a cape since I was dressed up as Batman as a student child, I found it took some time to get used to just the feel of not having sleeves. One early problem I found with wearing a cape/poncho is that it is not backpack friendly. It may seem obvious; however it had just bypassed my thinking when getting ready for work on my first rainy day of winter and led to me stupidly trying to put the backpack on underneath the cape. Do not, I repeat, DO NOT do this. You will get drenched on your back and sides and look like the Hunchback of Notre Dame. That said, my stupidity should not taint your thoughts on this poncho from Otto London. It is full of cycling-friendly features such as subtle reflective strips around the rim and vital handlebar straps on the inside so that you can keep the cape under control when you’re riding around. It also boasts an inner pocket for any valuables that you need to keep dry. The cape also has quite a rigid hood – which is GREAT.

The amount of times that hoods blow off in head winds with other jackets is infuriating, but with this Otto number the hood stays in place. One less hassle to deal with in atrocious weather. A downside of the cape though is that I found that it managed to accumulate small ponds between my arms in heavy rain, meaning this had to be disposed of at fairly regular intervals on my ride in. Overall, I found Otto London to have made an outstanding poncho. But, the trouble I have with the product is not the quality, but the fact it is a poncho (the same applies to capes). I struggled to truly understand the benefits of having a poncho instead a waterproof jacket. The restriction upon your arms I found to be particularly problematic. That said, if you do want a cape or poncho, this one comes highly recommended. You can check out Otto London’s range here. And read a review of Otto London’s BANG! Keep your drinks clean and tasting right with these tips. In a perfect world, hydration bladders would be drained, rinsed and air-dried every time you use them.

In the real world, packs are taken off and tossed in the closet or backseat of your car until the next run, meaning it’s already stocked with half a bag of chews and some water the next time you grab it. While that may sound like a time-saving win, it really isn’t. Friends don’t let friends drink slimy water—the stale chews are up to you. Those chunks in your hydration bladder? They aren’t supposed to be there. So does mildew, funky flavors and mold—especially if you add electrolytes or other drinks to your bladder. RELATED: Dos and Don’ts From Top Ultrarunners Let’s start with the obvious. For best results clean and dry with every use. On the rare occasion when you don’t (we aren’t judging), try some of these proven cleaning techniques. If nasty flavors persist, or cleaning the hose is more than you want to tackle, it’s probably time to replace your reservoir. Some new models even have anti-microbial coatings! • Dump out whatever is in your bladder and flush the hose (hold the bladder above your head, hold the hose down low and pinch the bite valve).
• Add warm water, swish, flush the hose and pour it out. • Scrub as much of the interior as you can reach using mild soap and a sponge or scrub brush. • Fill with warm water and half a teaspoon of bleach, two tablespoons of baking soda or two cups of white vinegar. Shake, close, then let sit for 30 minutes or so. • Dump out the cleaning solution, rinse well, flush the hose, prop the reservoir open and hang it to dry. The trick is making sure the bladder doesn’t stick together or close on itself. Try propping it open with balled up paper towels or a metal hanger that you’ve custom bent for that purpose. • If water from the reservoir still tastes unpleasant, repeat the process as indicated. You can also add some lemon juice to the cleaning solution. • If it’s too humid for your bladder to dry out between uses, storing it in the freezer between outings can help to prevent mildew growth. • Other options are to fill it about 2/3 with warm water and add one denture cleaning tablet for each liter of water.