goodway backpack coil cleaner

All Goodway catalogues and technical brochuresWrapping up your earbuds always ends up being an ordeal: they come undone in your bag, they get tangled, and are just a big pain in the butt. Wouldn't it be nice if tangled headphones were a thing of the past? Here's a look at a few ways to wrap up your headphones without the frustration. This is the go-to method for most of the Lifehacker team. It involves wrapping your headphones in a figure-8 pattern using your first finger and little finger as guides. Then you wrap the end up in the middle and stick the headphone jack through the loops you just made to secure it. This method doesn't require any special tools other than your hands, and it's an effective way to keep your headphones from unraveling, but it take a few tries to get it right. We obviously love binder clips, and they make for great cable-management tools. You can use them to hold your wrapped headphones in place so they don't get tangled up in your bag, or you can use a binder clip as the actual wrapping device.

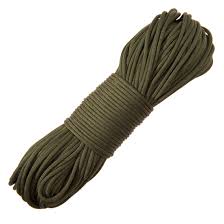
Just slap on the binder clip near the earpiece end and begin wrapping the cord around the two metal arms. You can use it as a cable shortener and even clip it on to your backpack for hassle-free listening. When you're done, you can take the headphone jack and feed it through the wider opening of the arms to keep it all in place. This method is very versatile, but it takes up a lot of space, so you won't be able to just slide them in and out of your pocket. If braiding is your thing, you can braid a friendship bracelet around your headphones to make them tangle-free using embroidery floss or even just some regular string. If you don't know how to braid, you can also use parachute cord (a.k.a. paracord) by just running your headphone wires through it. If both of those options don't sound like your cup of tea, you can buy headphones that already come braided to prevent them from getting tangled up. Even cheap headphones, like these Monoprice 8320s, already come braided for you. Braided headphones not only look great, but they prevent any tangles from occurring in the first place.

However, braiding takes a lot of time, so if you want braided headphones and don't want to take the time to do it yourself, buying braided headphones is your best bet. All those bends and kinks that you create by wrapping your headphones in different ways can destroy the cord over time, and some people are paranoid enough to avoid most wrapping techniques at all costs. If you're nodding your head, the over-under method is for you. You're simply alternating two different kinds of loops to counteract any kind of tangling when you unravel your headphones, so start by making a regular loop and then make another loop that goes in the opposite direction. The easiest way to do this is to grab the cable underhand, then bring it up and twist it a little as you make a loop out of it. This method can be a little tricky at first and may take a bit of practice, but it doesn't tangle your headphones at all and they're easy to unravel when you need them quickly. However, it still takes a lot of time to wrap them up no matter how good you are at it.

If you have a few minutes to spare and want a cheap and effective way to wrap your headphones, you can make a cord wrapper out of an old credit card or rewards card. Simply cut it in half and cut two angled slots, one at each end opposite of each other. Make sure to create a larger opening at the end of the slots so that you can fit the headphones through them. Just like the binder clip, you can use the card as a cable shortener and it takes up less space.
mcm backpack qooHowever, wrapping a cable around a credit card creates sharps bends in the cable that could ruin your headphones over time.
ogio tribune laptop backpackPlus, it's something that you can't use in a pinch, since it takes a little bit of time to make.
kegger backpack
Another great way to wrap your headphones is to use your phone or MP3 player as the actual wrapping device. It not only acts as a guide for your headphone wrapping, but it ensures that your headphones and the device you use your headphones with never get separated. You can do this many ways, but arguably the best method is to create a half-loop before you start wrapping the cable around, and then use the loop to secure the end by tightening it down. It's a bit tricky at first and can take some practice (see video above for a demo). Plus, you won't be able to slip your device in and out of your pocket.Care instructions for Columbia products As you continue to seek out new adventures, your clothing and shoes will get exposed to elements like mud, sand, water, gravel, grass, snow and salt which can degrade your clothing and shoes. We’ve put together some instructions for you to get the most out of your gear in the most environmentally friendly manner possible. Special Care Instructions for Columbia Technologies

In addition to the product care instructions on our website and on the care label of your garment, the following instructions will help to enhance performance for Columbia technologies: Do not bleach, use fabric softeners or stain removers as the chemicals can degrade the cooling performance of Omni-Freeze Zero. To best maintain Omni-Shield’s stain resistant properties, do not wash in hot water or iron. Omni-Shield Blood ‘N Guts To best protect the OutDry water repellent membrane, make sure your gear is clean and dry before storing. Best way to regularly clean your Columbia shoes If your footwear becomes damp and covered with mud, clean them immediately after use, do not leave them dirty to dry. Corrosive natural chemicals such as acids and alkalis which are found in different soils and dirt can work their way into the material and start to slowly decay and rot them thus weakening the overall strength of the boots. This also prevents damage to any waterproof linings and membranes that are inside.

The most effective way to clean your footwear is to immediately rinse them under clean tap water with a soft bristled brush. If possible, remove the insole inside the shoe and let them dry naturally. Do not under any circumstances put them in a clothes dryer, on top of a heater, near an open flame, or leave in direct hot sunlight. Removing stains from Columbia shoes Generally a mild dishwashing detergent can remove most stains. For oil, grease, ink, sap or gum, denatured or isopropyl alcohol is considered a degreasing agent and works best as a spot cleaner and can safely remove stains from many fabrics and leather that aren’t affected by soap or detergent. To remove stubborn stains, moisten a cotton cloth with a few drops of denatured alcohol. First test the alcohol on an inconspicuous part of the boot and allow it to dry. If there isn’t any discoloration, repeat and rub the stain, but do not saturate the fabric. Allow it to dry. Using a toothbrush or light bristled brush, clean the stain with a drop of dishwashing detergent and scrub until the stain disappears.
Rinse the boot in warm water and damp dry with a clean towel. Fully let dry naturally! Reapplying waterproof finishes on Columbia shoes Most waterproof / breathable materials are treated with a water repellent finish, which keeps the outer material from becoming saturated with water so the breathable barrier can do its job. This coating needs to be reapplied every so often. A simple water drop test can be performed to see if the boot should be recoated. If water no longer beads up on the outside of the boot, it’s time for another surface treatment. There are several spray products on the market that can restore water repellency. Whichever you choose, be sure to follow the manufacturer’s instructions. Before these treatments can be applied and effectively work, the footwear should be clean and dry. Repairing Columbia rubber boots If a pair of rubber boots is damaged during wear, they generally can be repaired with a simple rubber repair or stick-on patch kit. These patch kits are available at any footwear retailer.
First the boots must be clean and dry. Then follow the directions of the repair patch kit. Repairing Columbia rubber outsoles Over time, rubber outsoles can separate from the foam cushioning midsole or upper part of the footwear. This also can be repaired with a simple adhesive solution. Many footwear retailers offer various types of adhesives that can help repair this issue. Urethane adhesives work by coating both sides of the separation, letting it dry for a period of time and reactivating it with a heat source such as a blow dryer. A rubber based adhesive is used more as a contact cement. The adhesive is applied to both sides of the separation and allowed to dry for a short period of time and then is pressed together. Again, the area should to be clean, dry and prepared. Always follow manufacturer’s instructions. Repairing leather or synthetic materials in Columbia shoes There are leather repair kits available on the market that can repair rips, burns, cuts, and tears.