golite dawn backpack

Taking consistent care of your pack will ensure it holds up optimally. Packs need love too! + After each trip be sure to clean out your pack thoroughly. + Use mild soap like Nikwax Tech Wash, warm water and a soft brush to clean zippers often to prevent them from failing. + If your pack is wet, hang it to dry. + Loosen all the straps. + Wash your pack if dirt, sweat, salt and stains have worked their way into fabrics, webbing or mesh. (Do not immerse travel packs with our High Road™ Wheeled Chassis.) 1. If your pack has a removable harness and hipbelt remove them from the pack body. 2. Brush out and remove gear, food, dirt or spilled items. 3. Don’t wash in washing machine. Clean your pack and components in a bathtub or large sink using a mild soapand warm water. Osprey recommends Nikwax Tech Wash. 4. Agitate the pack gently and scrub inside and out all compartment and pockets with a soft brush. 5. Brush clean all zippers and flush clean the buckles. 6. Drain the soapy and dirty water from the bathtub or sink and refill with cool clean water.

Rinse the pack thoroughly. 7. Hang dry outdoors or in a well-ventilated area out of direct sunlight. + Rinsing it out after each use should keep your reservoir fresh, especially when using sugary drink mixes. + Periodically use Hydraulics™ Cleaning Tablets to clean your reservoir. + Using Iodine or other purifying tablets are ok to use but may stain the reservoir over time. + Freezing your reservoir is ok but be aware of water expanding when freezing so don’t overfill. + DO NOT pour boiling hot liquid into the reservoir; it will void your warranty. + Watch “Cleaning an Osprey Hydraulics™ Reservoir” video on Osprey Packs YouTube page. 1. Fill reservoir with warm water, do not use boiling water. 2. Add one cleaning tablet to reservoir. 3. Let dissolve for 5 minutes with the reservoir laying on its back. 4. Shake the reservoir for 30 seconds to mix and spread the solution. 5. Pinch the bite valve and squeeze the reservoir to remove air and fill the reservoir hose and bite valve with solution.

6. Let reservoir sit for 15 minutes and then pour out solution. 7. Rinse reservoir and tube with clean water. 8. Follow directions for Cleaning Your Reservoir below for a deeper clean after these steps. 1. Rinse out the reservoir and fill with warm water and a mild detergent, do not use Bleach or boiling water. 2. Use the large brush from our Hydraulics™ Reservoir Cleaning Kit to scrub the interior of the reservoir.
top gear the stig school backpack3. Remove the hose from the reservoir and the bite valve from the hose and use the small brush from our Hydraulics™ Reservoir Cleaning Kit to scrub the interior of the hose.
unusual backpack expander4. Remove the silicone bite valve cover and clean it and the bite valve with warm soapy water.
bolles backpack login
5. Let the hose and bite valve dry in a well-ventilated area. 6. Insert the drying rack from the Hydraulics™ Reservoir Cleaning Kit through the cap and into the reservoir to hang and let dry and in well-ventilated area. (Do not immerse travel packs with Osprey's Wheeled Chassis) 1. After each trip brush out and remove all gear, clothes, food, dirt or spilled items. 2. Use mild soap, warm water and a soft brush to clean zippers often to prevent them from failing.
national geographic backpack 51603. Wipe the exterior of the chassis and scrub stains on and in the pack fabric using a bucket of warm water, mild detergent and a soft brush or sponge.
national geographic backpack 50704. Use a wet towel with clean non-soapy water to wipe away any soap residue.
asus g74sx laptop backpack
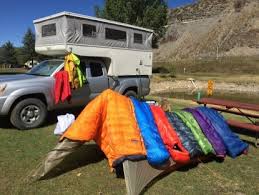
5. Hang dry outdoors or in a well-ventilated area out of direct sunlight. + Osprey recommends the following Nikwax® products for pack care. Be sure to read label directions carefully before applying any product to your pack. + Tech Wash- Use this with warm water for washing and cleaning your packs or luggage. + Tent & Gear Solar Proof- Use this spray-on product to protect your packs from UV exposure and to improve water repellency.Your down sleeping bag will loft better and keep you warmer if you wash it occasionally. I try to wash mine annually, but I also spend many dozens of nights out using it each year.If you don’t have the time to wash your down sleeping bag, you can send it to a service called RainyPass that REI and many other sleeping bag manufacturers recommend. They do an excellent job and will also do repairs if needed. I’ve used them before, but you can expect to pay about $50 while washing your sleeping bag yourself will cost about half that.Honestly, washing your own sleeping bag is a lot easier than you think.
Go to a laundromat and with a large capacity or commercial-sized front loading washing machine and dryer. The agitator in a top loading washer is too rough and can tear the baffles of your sleeping bag.Bring a good book or go to a laundromat that has wi-fi. The entire process will take 4-6 hours and you’ll want some entertainment.Before you do anything, buy yourself a product made especially for washing down such as Nikwax Down Wash. These are special non-detergent soaps that won’t strip the oil from the down in your sleeping bag. Regular powder or liquid detergent is way too harsh for goose and duck down and you shouldn’t use them to wash a down bag.When you get to the laundromat, open up each front loader and run your hand over the interior drum feeling for burrs in the metal or foreign objects like safety pins where the fabric of your bag can catch and tear. If your detect any, move to another machine until you find one that is smooth inside.Next, inspect the detergent dispenser, and see if it’s clean or has a residue of old detergent, fabric softener, or bleach.

If it does, clean these out carefully or move to another machine. To be on the safe side, you can also run an empty load to wash out any residual soap or additives. I do this myself.If your sleeping bag has a waterproof exterior shell, like Gore-Tex, turn it inside out, so that water can reach the down. If the shell is not a waterproof membrane just leave the exterior shell on the outside. Next make sure all the zippers are closed and that all velcro fasteners are properly mated.Set the temperature of the water to low or warm and wash on a gentler or delicates cycle.After the first wash is complete, do another without any down soap, to make sure that the down in your sleeping bag has been rinsed fully.Before your bag has finished rinsing, find a front loading dryer to dry it in. Repeat the drum inspection process you used before and eliminate any dryer that has imperfections or burrs on it where the fabric of your bag can catch and tear. It’s also important that the dryer have a low temperature setting.

Carefully lift your wet sleeping bag out of the washing machine and carry it over to the dryer. It’s important that you support the whole bag in your hands or lay it on a cart. Your bag is in a very fragile state when it’s wet. The feathers are saturated with water and can tear through the baffles if they’re unsupported.Feed in quarters for 20 minutes and set the dryer temperature to low. You’ll keep it at this temperature for the entire drying process.After 20 minutes, check your sleeping bag. There will be clumps of down in the bag. Gently break them up with your hands and let the bag dry for another 20 minutes. Repeat this process for three or more hours or until all of the down clumps have broken up.While dry times will vary across sleeping bags, it take me about 200 minutes (3.5 hours) of drying time for a three-season 20 degree down sleeping bag. That should help give you a baseline for what to expect.When you leave the laundromat, don’t put your sleeping bag in a stuff sack or compress it.